
Jelly Roll Cake Recipe
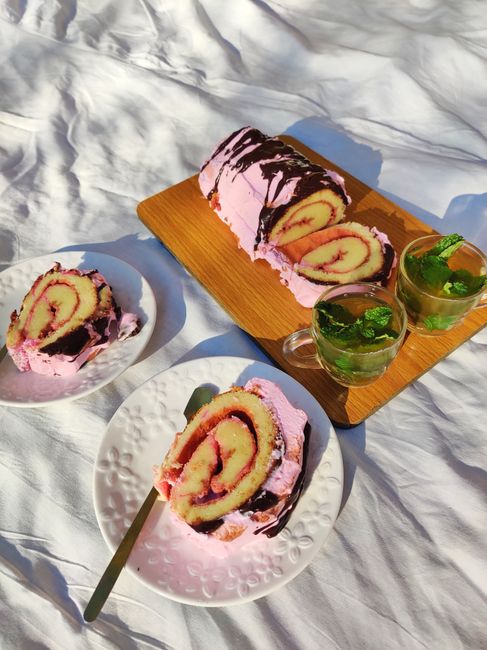
Whipping the eggs and sugar to full volume before adding a small amount of flour gives the sponge just enough structure to roll without cracking, while rolling it up warm, right out of the oven, trains the cake into its curled shape before it has a chance to set flat.
- Prep
- 20 min
- Cook
- 12 min
- Total
- 32 min
- Servings
- 10
Ingredients
- 4 large large eggs
- 3/4 cup granulated sugar
- 3/4 cup all-purpose flour
- 1 tsp baking powder
- 1/4 tsp salt
- 1 tsp vanilla extract
- 1 cup seedless raspberry jam
- 3 tbsp powdered sugar, for dusting
Nutrition per serving
- Calories
- 156
- Protein
- 4g
- Carbs
- 31g
- Fat
- 2g
Based on the recipe as written, one serving. Recalculates if you swap an ingredient above. An estimate only, exact values depend on the specific ingredients used.
Need different units or a different yield? Try our Conversion Calculator →
Instructions
- 1Preheat the oven to 375°F (190°C). Grease a 10x15-inch jelly roll pan, line it with parchment paper, and grease the parchment as well.
- 2In a large bowl, beat the eggs and granulated sugar with an electric mixer on high speed for 5-7 minutes, until pale, thick, and roughly tripled in volume; the batter should hold a ribbon trail when the beaters are lifted.
- 3Whisk together the flour, baking powder, and salt in a separate bowl. Sift over the egg mixture in three additions, folding gently after each just until no streaks of flour remain, then fold in the vanilla.
- 4Spread the batter evenly into the prepared pan, pushing it into the corners with an offset spatula so the layer is uniformly thin.
- 5Bake for 10-12 minutes, until the cake springs back when lightly pressed and the edges just begin to pull from the sides of the pan.
- 6While the cake bakes, lay a clean kitchen towel on the counter and dust it heavily with powdered sugar.
- 7As soon as the cake comes out of the oven, run a knife around the edges and turn it out onto the sugared towel. Peel off the parchment.
- 8Starting from one short end, roll the warm cake up together with the towel into a log. Set it seam-side down on a wire rack and let it cool completely, at least 30 minutes.
- 9Unroll the cooled cake gently, keeping it on the towel. Spread the jam evenly over the surface, leaving a half-inch border on all sides.
- 10Re-roll the cake without the towel this time, starting from the same end. Wrap tightly in plastic wrap and chill for at least 30 minutes before slicing.
- 11Dust with additional powdered sugar and slice crosswise to serve.
Tips & variations
- Use a light-colored, uncoated aluminum jelly roll pan for the most even bake; dark nonstick pans can brown and set the thin batter before the center finishes cooking.
- Swap the raspberry jam for lemon curd, Nutella, or lightly sweetened whipped cream for a different filling.
- Replace 2 tablespoons of the flour with unsweetened cocoa powder for a chocolate version, and fill with whipped cream instead of jam.
Storage & reheating
Wrap the rolled cake tightly in plastic wrap and refrigerate for up to 4 days. To freeze, wrap the whole log in plastic wrap and then foil and freeze for up to 2 months; thaw overnight in the refrigerator before slicing.
Tips from the Tulo kitchen
- If the sponge sticks stubbornly to the parchment after baking, press a damp towel briefly against the back of the parchment; the steam helps release it.
- Trim about half an inch off both short ends of the finished roll with a serrated knife before slicing; the very ends tend to be drier and untidy.
FAQ
Why did my jelly roll cake crack?
Cracking usually comes from cooling the cake flat before rolling it, or from overbaking it past the point where it stays flexible. Roll it warm, right out of the oven, together with the towel.
Do I really need a jelly roll pan for this?
Yes, or at least a pan of similar dimensions. The 10x15-inch size spreads the batter thin enough that it bakes quickly and stays flexible; a smaller, deeper pan makes a thicker cake that's much more likely to crack when rolled.
Can I make a jelly roll cake ahead of time?
Yes. Roll and fill it up to a day in advance, keep it wrapped tightly in the refrigerator, and slice just before serving so the cut edges stay neat.